Currently Empty: $0.00
Top Canva Hacks for 2024: Elevate Your Design Game

Introduction
As the world of digital design continues to evolve, Canva remains a powerhouse for both novice and seasoned designers. With its user-friendly interface and a plethora of features, Canva is a go-to tool for creating stunning visuals. To help you make the most out of Canva in 2024, we’ve compiled a detailed list of top hacks that will elevate your design game. Whether you’re creating social media posts, presentations, or marketing materials, these tips will enhance your productivity and creativity.
1. Leverage the Power of Brand Kits
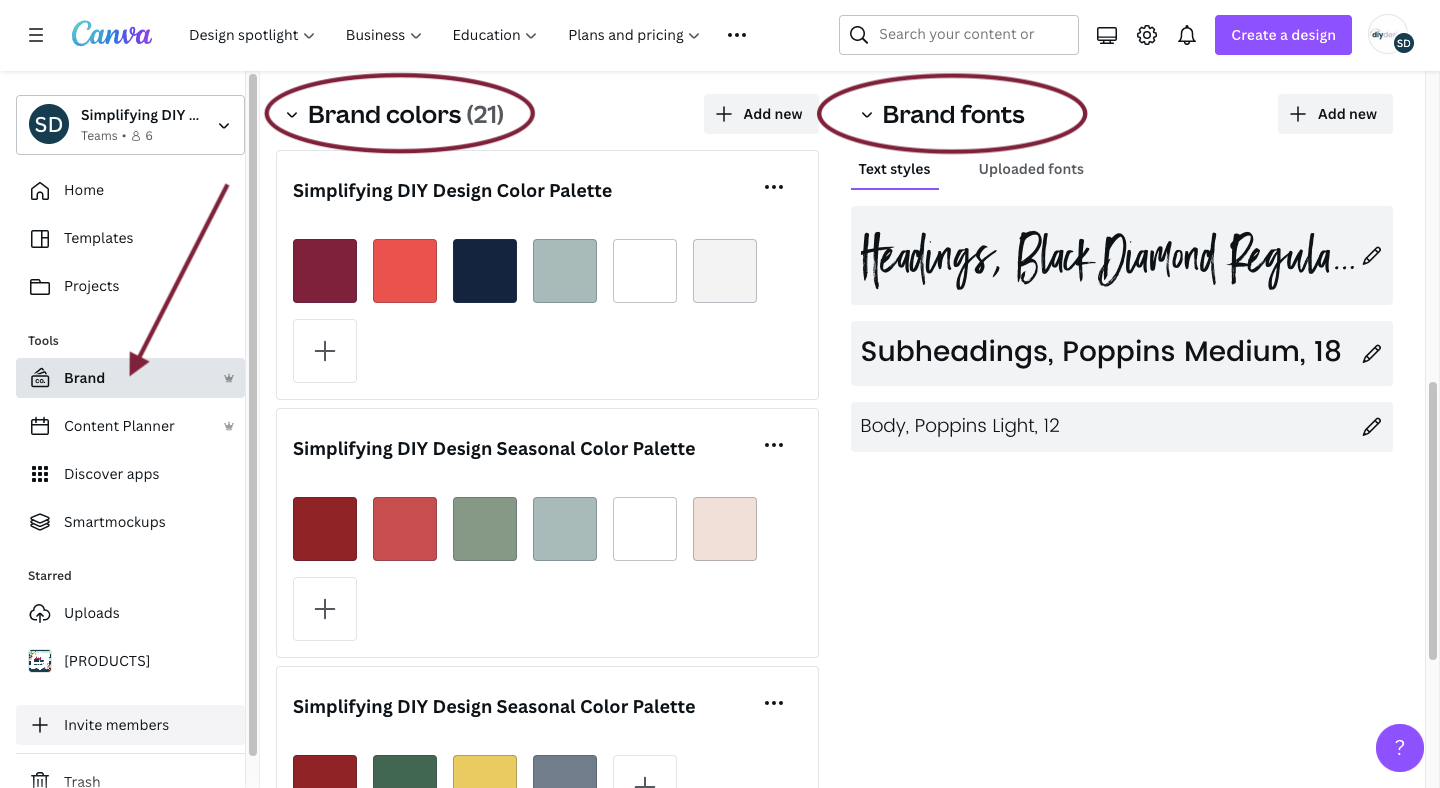
Maintaining brand consistency across all your designs is crucial. Canva’s Brand Kit allows you to upload your brand’s logos, fonts, and color palettes, which you can then apply to any design with ease. This feature ensures that your brand’s identity is always reflected accurately and consistently, enhancing your professional image.
How to Use:
- Go to the Brand Kit section under the “Tools” tab.
- Upload your logos by clicking on the “Upload” button.
- Select your brand colors by entering hex codes or using the color picker.
- Choose your fonts from Canva’s extensive library or upload custom fonts.
- Apply these elements to any design with just a few clicks by selecting them from the Brand Kit panel.
2. Use Magic Resize for Multi-Platform Content
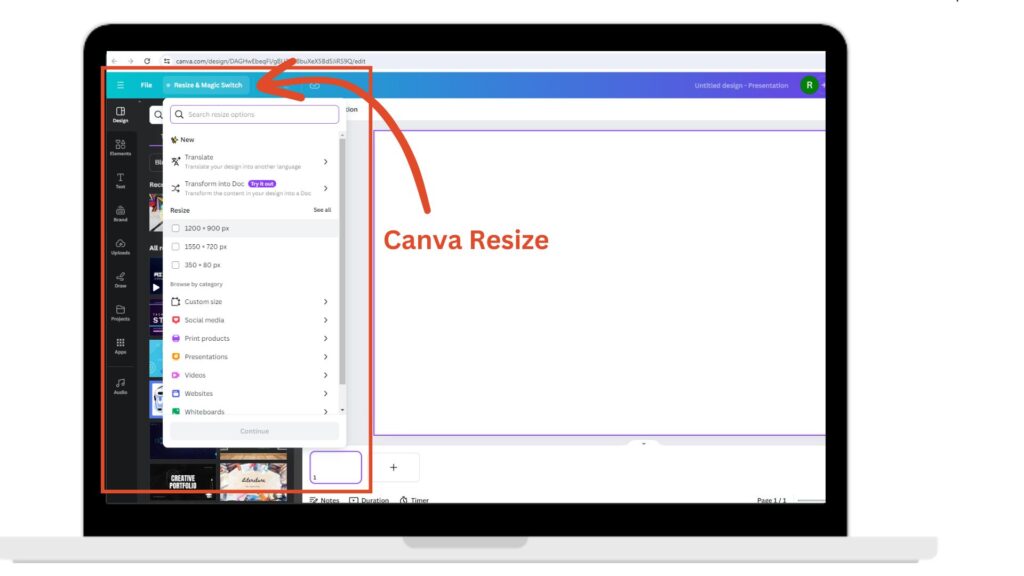
The Magic Resize feature is a true game-changer for designers who need to adapt their work for multiple platforms. Instead of manually resizing each design, you can use Magic Resize to quickly adjust your project for various social media dimensions. For instance, you can create a design for Instagram and resize it for Facebook, Twitter, and Pinterest with just one click, saving you valuable time and effort.
How to Use:
- After creating your design, click on the “Resize” button in the top menu.
- Select the platforms you need, such as Instagram Post, Facebook Cover, Twitter Post, etc.
- Canva will automatically resize your design to fit the selected dimensions.
- Adjust any elements that may have shifted during the resizing process to ensure a perfect fit.
3. Explore the Content Planner
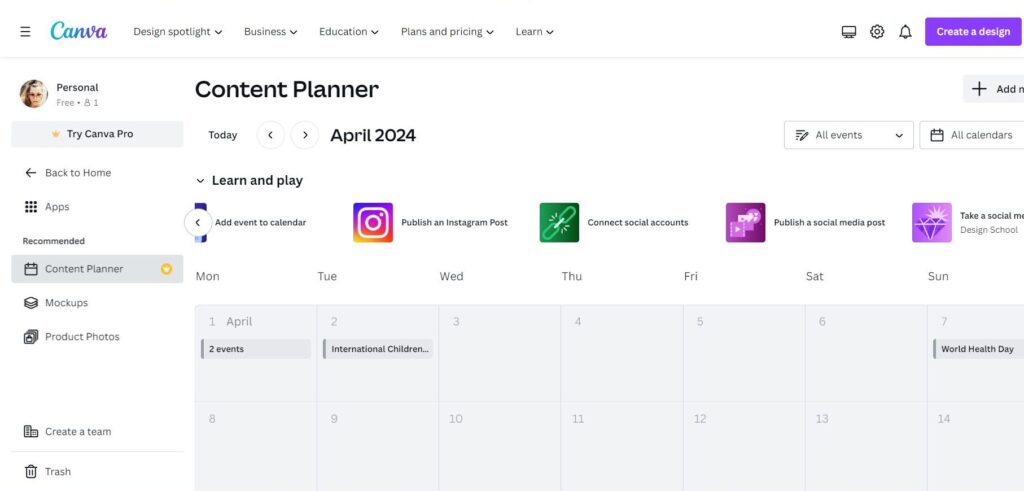
The Content Planner feature allows you to plan and schedule your social media posts directly from Canva. This integrated tool enables you to create, schedule, and publish posts to multiple platforms without leaving Canva. It’s a great way to streamline your social media strategy and ensure consistent posting. Stay ahead of your social media schedule with Canva’s Content Planner. This tool allows you to schedule your posts directly from Canva, ensuring your content is consistently published.
How to Use:
- Access the Content Planner from the “Tools” tab.
- Create your design as usual.
- Instead of downloading your design, click “Schedule.”
- Choose the date and time you want your post to go live.
- Connect your social media accounts to Canva to enable direct posting.
4. Creating custom Canva’s Templates
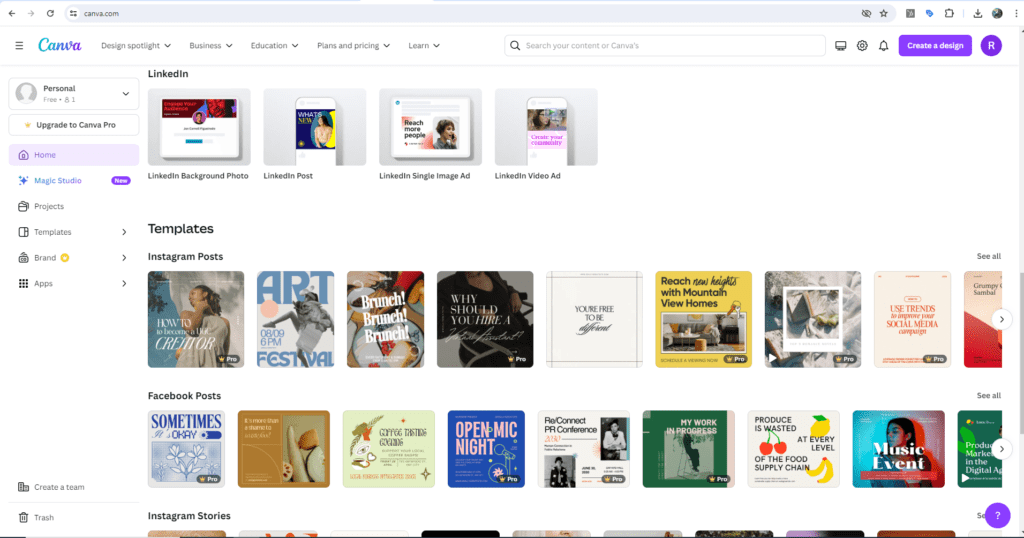
Creating custom templates can save you a significant amount of time, especially if you frequently produce similar types of content. Once you’ve designed a layout you love, save it as a template. You can then reuse this template for future projects, ensuring consistency and efficiency in your design process.
How to Use:
-
- Create a design that you want to use as a template.
- Once finished, click “File” on the top left.
- Select “Save as template.”
- Name your template and save it.
- Access your custom templates from the “All your designs” section or the “Templates” tab.
5. Incorporate AI-Powered Tools
Canva’s AI tools, such as Magic Write and Magic Design, can help streamline your creative process. Magic Write assists with text generation, while Magic Design offers suggestions to enhance your visuals.

How to Use:
- Access these tools under the “Tools” tab.
- Use Magic Write to generate catchy headlines or body text by inputting a brief description or keywords.
- Utilize Magic Design for layout suggestions and enhancements by selecting a design style and letting the AI suggest improvements.
6. Master the Use of Layers
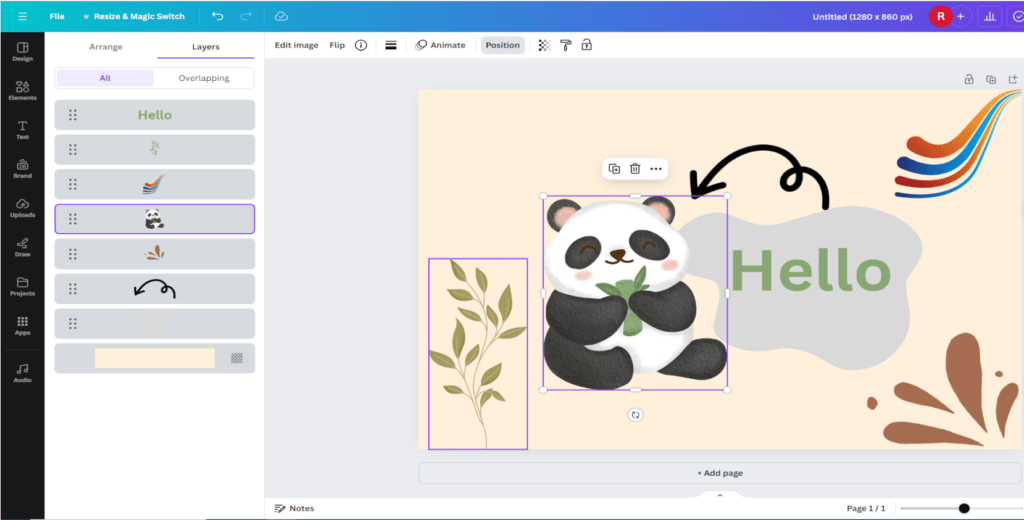
Layering is a fundamental design technique that can add depth and complexity to your projects. Canva’s Arrange tool allows you to bring elements forward or send them backward, helping you create more dynamic and visually appealing designs. Mastering layering can take your designs from flat to fabulous. Organizing elements with layers can make complex designs more manageable. You can move, lock, and hide layers to control different parts of your design without affecting others.
How to Use:
- Click on the “Position” button to arrange layers (forward, backward, etc.).
- Lock layers to prevent accidental changes by clicking the padlock icon in the layers panel.
- Use the “Layers” panel to show or hide elements by clicking the eye icon next to each layer..
7. Text Effects
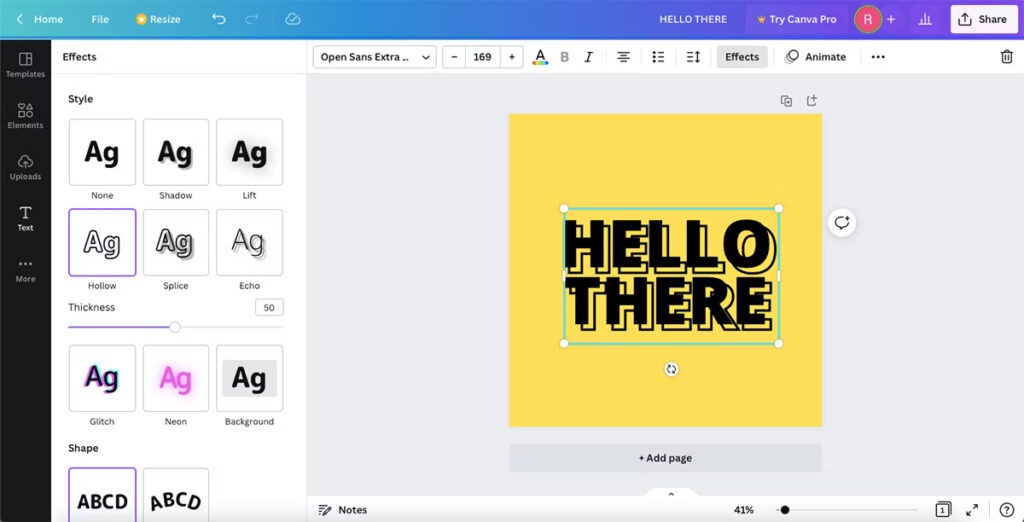
Typography can make or break a design. Canva’s text effects, including shadow, lift, and echo, can add depth and dimension to your text. These effects make your typography more engaging and help your message stand out.
How to Use:
- Add or select a text box in your design.
- Click on “Effects” in the top toolbar.
- Choose from various effects such as Shadow, Lift, Echo, or Neon.
- Adjust the settings (e.g., intensity, direction, color) to customize the effect.
8. Elements Search
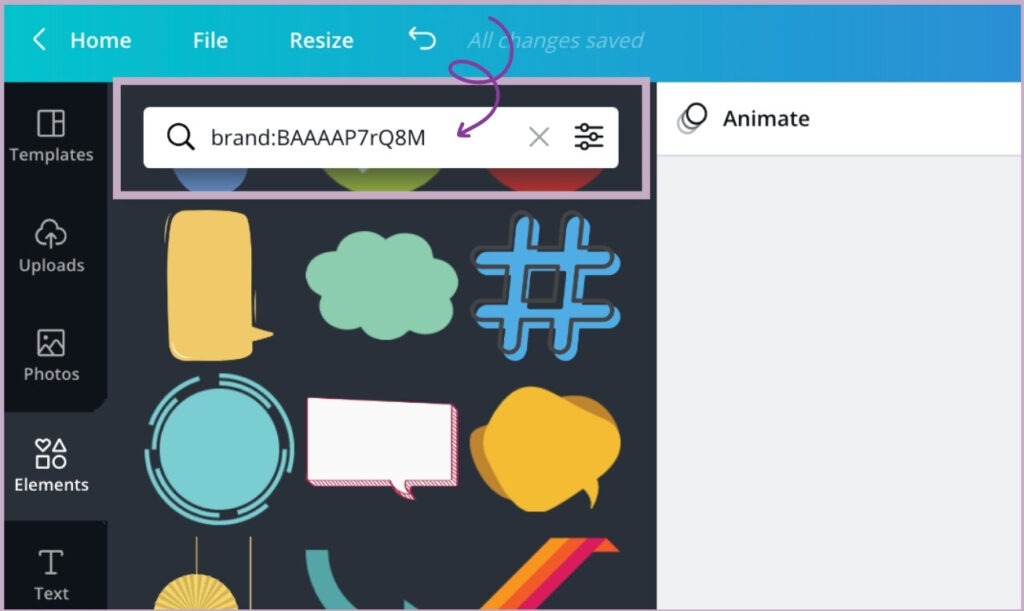
Finding the right elements can sometimes be a time-consuming process. Canva’s advanced search filters allow you to find the perfect elements quickly. You can filter by color, orientation, and even free/pro status. This not only saves time but also helps you discover new elements that can enhance your designs.
How to Use:
- Click on “Elements” from the left sidebar.
- Use the search bar to enter keywords related to the elements you need.
- Use the filters (e.g., color, orientation, free/pro) to narrow down your search.
- Browse the filtered results and click to add the desired element to your design.
9. Harness the Power of Canva Apps and Integrations
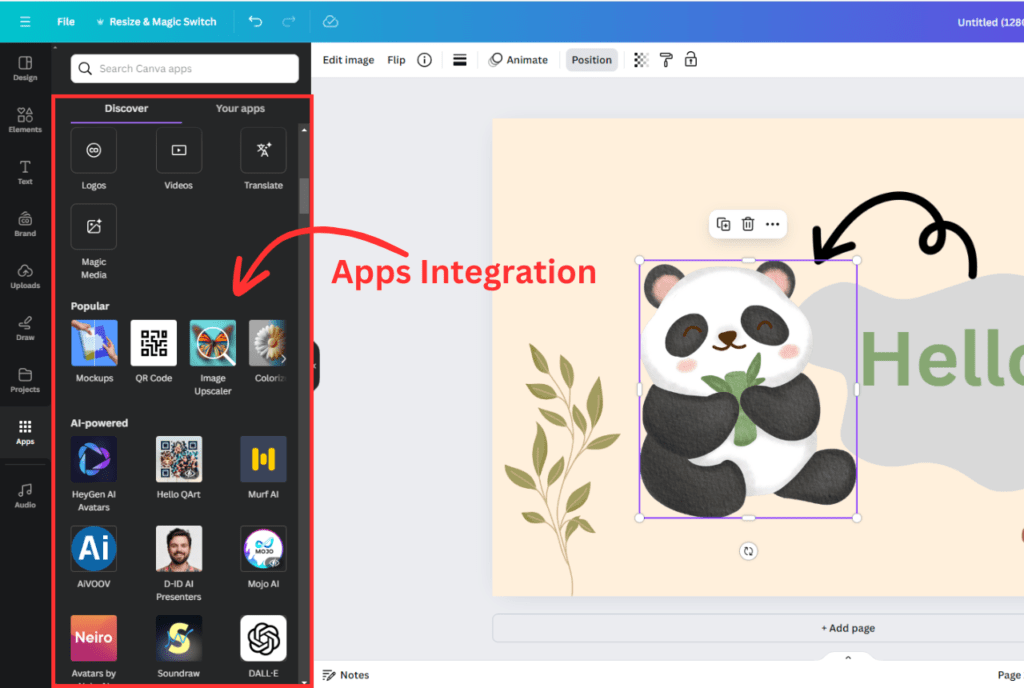
Canva integrates with various apps and services like Google Drive, Dropbox, and social media platforms. These integrations make it easy to import content and export designs without leaving Canva.
How to Use:
- Go to the “More” section in the side panel to explore integrations.
- Connect your accounts (e.g., Google Drive, Dropbox) by following the prompts.
- Directly import images, videos, or files from these connected services.
- Export your designs to other platforms (e.g., share directly to Instagram or Facebook).
10. Utilize Animation for Engaging Designs
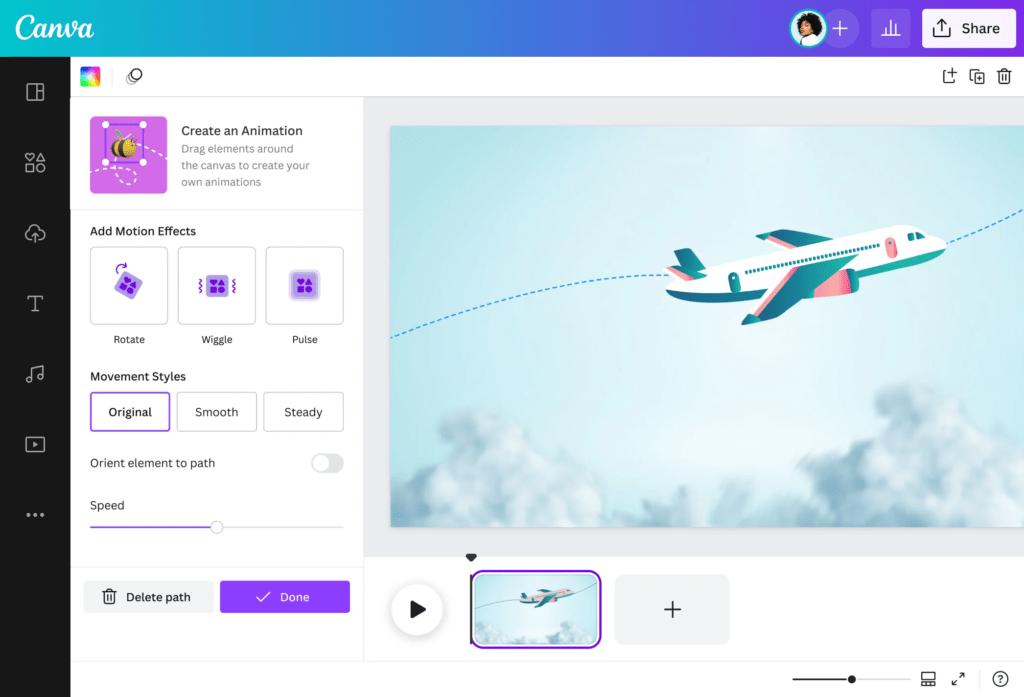
Animation can bring your designs to life. Canva’s animation tools let you animate text, elements, and entire pages. This is ideal for creating eye-catching social media stories, ads, or presentations. With various animation styles to choose from, you can make your content more dynamic and engaging.
How to Use:
- Select the element you want to animate.
- Click on the “Animate” button in the top menu.
- Choose from various animation effects like fade, pan, or zoom.
- Customize the duration and direction of the animation.
- Preview the animation to ensure it looks just right before saving or publishing.
11. Explore the New Background Remover Tool
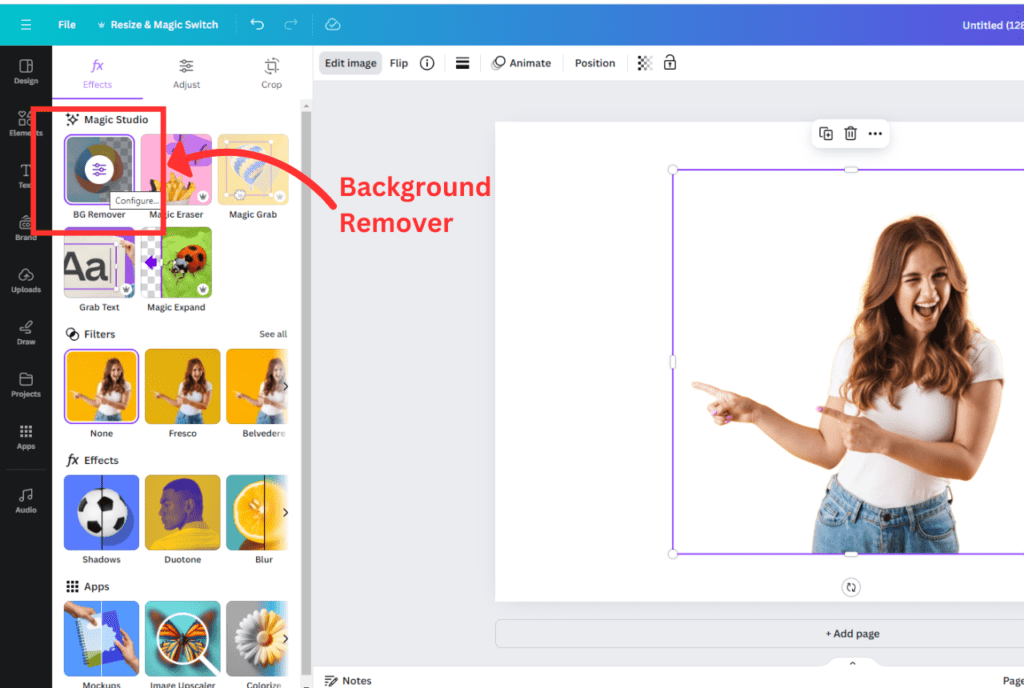
Canva’s Background Remover tool has become increasingly precise, making it easier than ever to isolate subjects from their backgrounds. Whether you’re working with portraits or product photos, this tool can quickly give you a clean, professional look. Simply upload your image, use the background remover, and you’re left with a polished, isolated subject ready for any backdrop.
How to Use:
- Upload your image and select it.
- Click on “Edit Image” and then “Background Remover.”
- Canva will automatically remove the background.
- Use the eraser and restore brushes to fine-tune the result, ensuring that all unwanted background elements are removed.
12. Grids and Frames
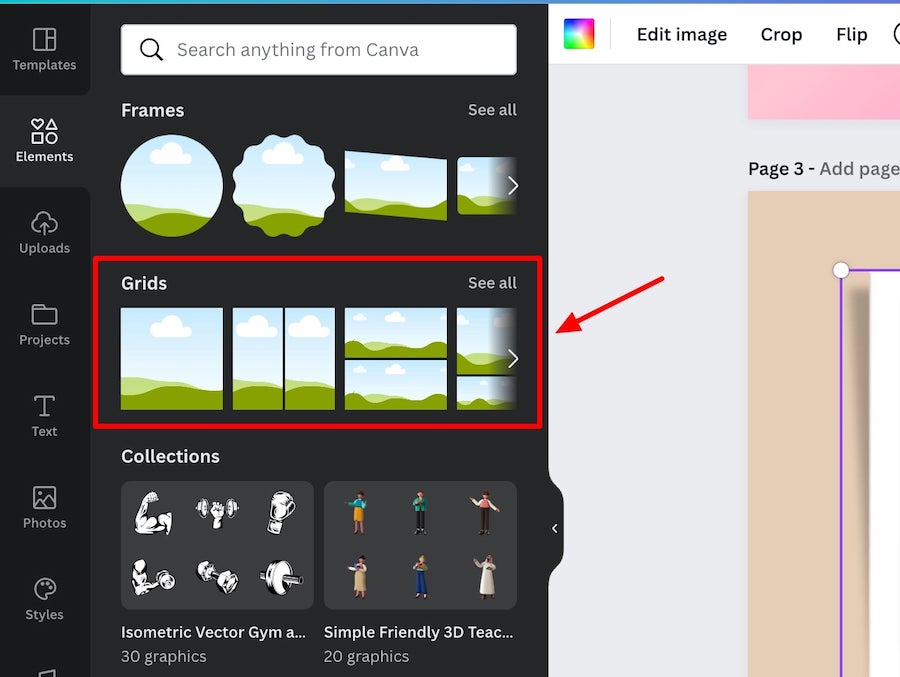
Ensure your designs are structured and neat with grids and frames. These tools help you align elements perfectly, maintaining a clean and professional look. They’re particularly useful for creating balanced layouts and structured designs.
How to Use:
- Click on “Elements” from the left sidebar.
- Scroll down to find “Grids” or “Frames.”
- Drag and drop a grid or frame onto your design canvas.
- Insert images or elements into the grid or frame by dragging and dropping them into place.
13. Custom Charts
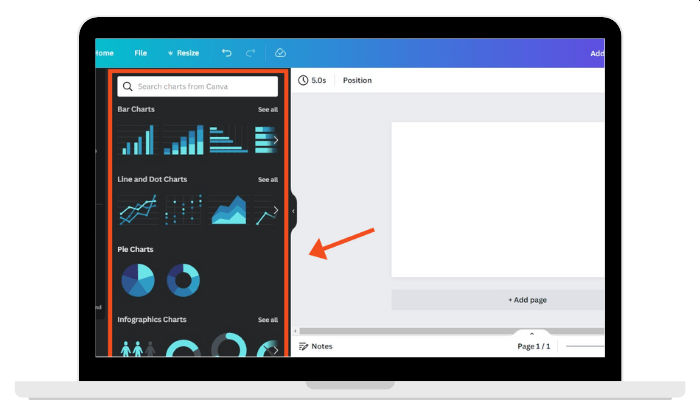
Visualizing data has never been easier. Canva’s custom charts feature allows you to create beautiful charts and graphs. This is perfect for infographics, presentations, or any design that requires data visualization. Customize the colors and styles to match your brand.
How to Use:
- Click on “Charts” from the left sidebar.
- Select the type of chart you need (e.g., bar, pie, line).
- Drag and drop the chart onto your design canvas.
- Click on the chart to edit the data and customize the colors and styles.
14. Stock Photos and Videos
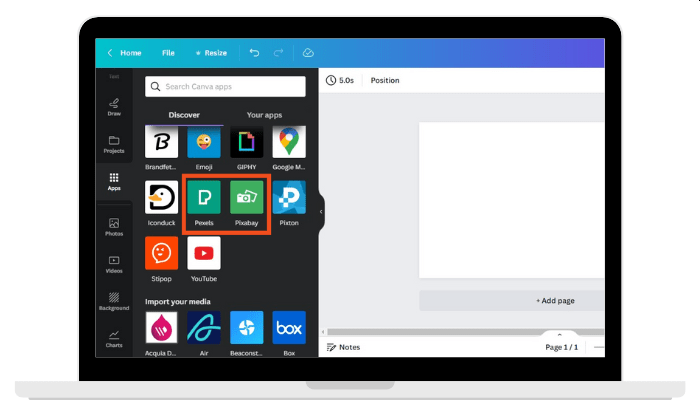
Canva offers an extensive library of high-quality stock photos and videos. These assets can enhance your designs without the need for a separate stock photo subscription. With a wide range of categories, you’re sure to find the perfect image or video for any project.
How to Use:
- Click on “Photos” or “Videos” from the left sidebar.
- Use the search bar to find relevant stock photos or videos.
- Browse through the results and click to add your selected image or video to your design.
- Adjust the size and position as needed.
15. Collaborate in Real-Time
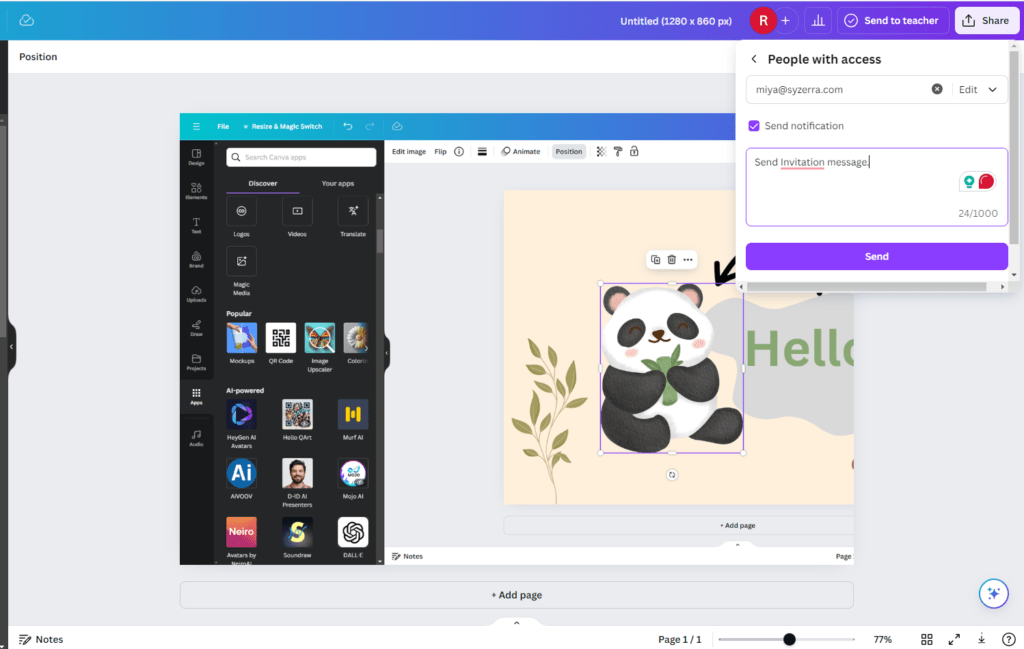
Canva’s collaboration features make it easy to work with a team. Share your designs with others, giving them editing or viewing permissions. This is perfect for team projects, client work, or any scenario where multiple people need to contribute to or review a design. Real-time collaboration ensures everyone stays on the same page, streamlining your workflow.
How to Use:
- Click on the “Share” button and invite team members to edit by entering their email addresses.
- Use the comments feature to leave feedback and suggestions.
- See changes in real-time as team members contribute to the design.
- Collaborate on different aspects of the project without the need for back-and-forth emails or file exchanges.
Conclusion
Canva continues to be a versatile and powerful tool for designers of all levels. By incorporating these top hacks into your workflow, you can create stunning, professional-quality designs more efficiently. Stay ahead of the curve in 2024 by mastering these features and transforming your creative process with Canva.
With these detailed tips and tricks, you’ll be well-equipped to make the most out of Canva’s offerings, ensuring that your designs stand out and your workflow is streamlined. Happy designing!


