Currently Empty: $0.00
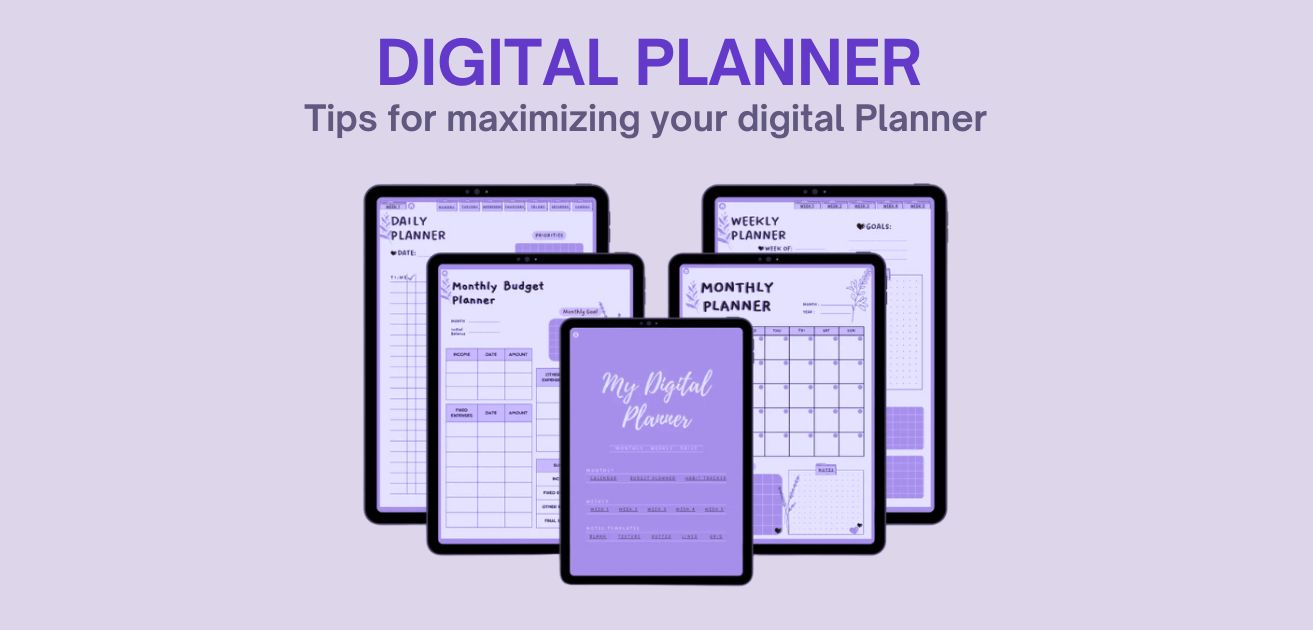
Unlock Your Productivity: 10 Tips for Maximizing Your Digital Planner
Introduction:
In today’s fast-paced world, where staying organized and maximizing productivity are crucial for achieving success, digital planners have revolutionized how we manage schedules, tasks, and goals. Whether you’re a busy professional balancing multiple responsibilities, a student managing academic deadlines, or an individual focused on personal growth, leveraging a well-organized digital planner can significantly enhance efficiency. In this blog post, we’ll discover 10 actionable tips For maximizing your digital planner to boost your productivity. Discover how to harness the full potential of digital planning tools to streamline your workflow, prioritize tasks effectively, and achieve your goals with greater ease and efficiency.
1. Choose the Right Digital Planner
Choosing the right digital planner involves considering your personal preferences, needs, and the features that will best support your productivity and organization. Here are some key factors to help you make the right choice:
a. Purpose and Goals
- Identify Your Needs: Determine what you need a planner for (e.g., daily tasks, long-term projects, goal setting, habit tracking).
- Set Goals: Know your primary goals for using a planner, such as increasing productivity, staying organized, or tracking habits.
b. Compatibility
- Device Compatibility: Ensure the digital planner works with your device (e.g., iPad, tablet, smartphone, or computer).
- Operating System: Check if the planner is compatible with your device’s operating system (iOS, Android, Windows, etc.).
c. Features and Functionality
- Customization: Look for a planner that allows customization to suit your specific needs (e.g., adding pages, changing layouts, inserting stickers).
- Integration: Consider if the planner integrates with other apps you use (e.g., calendar apps, note-taking apps, task managers).
- Templates: Ensure the planner offers templates that match your planning style (daily, weekly, monthly layouts, goal tracking, habit tracking).
- User Interface: Choose a planner with an intuitive and user-friendly interface that you find easy to navigate.
d. Ease of Use
- Learning Curve: Consider how easy the planner is to use and whether it has a steep learning curve.
- Customer Support: Check if the planner offers customer support or tutorials to help you get started.
e. Aesthetics and Design
- Visual Appeal: Select a planner with a design that you find visually appealing, as this can motivate you to use it regularly.
- Customization Options: Look for options to personalize the look of your planner (colors, fonts, themes).
f. Functionality
- Writing Tools: Ensure the planner supports various writing tools, such as stylus compatibility, text input, and handwriting recognition.
- Organizational Tools: Look for features like hyperlinks for easy navigation, tabs, and search functions.
- Syncing: Choose a planner that syncs across devices if you plan to access it from multiple devices.
g. Reviews and Recommendations
- User Reviews: Read reviews from other users to understand the planner’s strengths and weaknesses.
- Recommendations: Seek recommendations from friends, colleagues, or online communities who have similar planning needs.
h. Price and Value
- Cost: Consider the cost of the digital planner and whether it fits within your budget.
- Value: Assess if the planner offers good value for its price based on its features and functionality.
Choosing the right digital planner is a personal decision that depends on your specific needs and preferences. By considering the factors outlined above, you can find a planner that enhances your productivity, organization, and overall planning experience. Taking the time to explore different options and testing them out will help you find the perfect digital planner for your lifestyle.
2. Customize Your Planner for a Personal Touch
Personalizing your digital planner can make it more enjoyable to use and help you stay engaged with your tasks. Here are some ways to add a personal touch to your digital planner:
-
Choose a theme or template:
Many digital planners offer a variety of themes or templates to choose from — find one that resonates with your style and preferences.
-
Customize fonts and colors:
Adjust the fonts, sizes, and colors to make your planner uniquely yours. This can also help create a visually appealing layout that’s easy on the eyes.
-
Add personal images or stickers:
Incorporate your favorite photos, inspirational quotes, or stickers to make your digital planner feel more like your own personal space.
-
Organize your layout:
Rearrange the sections of your digital planner to best suit your workflow. For example, you might want a dedicated space for daily tasks, a section for long-term goals, and a spot for notes or brainstorming.
By customizing your digital planner, you’ll create a space that feels welcoming and motivating, encouraging you to stay on track with your tasks and goals.
3. Set Specific Goals for Maximum Effectiveness

Setting clear and specific goals is key to getting the most out of your digital planner. By outlining your objectives, you’ll have a better sense of direction and be able to focus on what truly matters. Here are some tips for setting effective goals:
-
Make your goals SMART:
SMART stands for Specific, Measurable, Achievable, Relevant, and Time-bound. By following these criteria, you’ll set goals that are clear, realistic, and trackable.
-
Break down large goals into smaller steps:
Instead of trying to tackle a big goal all at once, break it down into smaller, more manageable tasks. This will make your goals feel less overwhelming and give you a sense of accomplishment as you complete each step.
-
Set deadlines:
Deadlines help you stay accountable and ensure that you’re making progress toward your goals. Be sure to include deadlines for both your larger goals and smaller tasks in your digital planner.
-
Review and adjust your goals:
Regularly reassess your goals to make sure they’re still relevant and achievable. If necessary, make adjustments to keep yourself on track and motivated.
By setting specific goals and incorporating them into your digital planner, you’ll be well on your way to boosting your productivity and achieving your objectives.
4. Sync Your Planner with Other Devices
One of the biggest advantages of using a digital planner is the ability to sync your data across multiple devices. This ensures that you always have access to your planner, no matter where you are or what device you’re using. Here’s how to make the most of this feature:
-
Choose a digital planner with cross-platform compatibility:
Look for a digital planner that works on various devices, such as smartphones, tablets, and computers, and supports different operating systems like iOS, Android, and Windows.
-
Sync your planner with cloud storage:
Many digital planners offer the option to sync your data with cloud storage services like Google Drive, Dropbox, or iCloud. This not only ensures that your planner is always up-to-date across all devices but also provides a backup in case something happens to your device.
-
Use apps that integrate with your digital planner:
Some digital planners can connect with other productivity apps, such as email clients, calendar apps, or note-taking tools. This helps you streamline your workflow and keep everything in one place.
-
Set up automatic syncing:
If possible, enable automatic syncing in your digital planner’s settings. This way, your planner will update in real-time across all your devices without you having to manually sync it every time.
By syncing your digital planner with other devices, you’ll never be without your schedule and tasks, making it easier to stay organized and productive wherever you go.
5. Use Color-Coding to Organize Tasks
Color-coding is a simple yet powerful way to organize your tasks in a digital planner. By assigning different colors to various tasks or categories, you can quickly identify what needs your attention and prioritize your work more effectively. Here’s how to use color-coding to your advantage:
-
Choose a color scheme:
Start by selecting a set of colors that resonate with you. You can use any number of colors, but it’s best to limit yourself to a handful, so your planner doesn’t become visually overwhelming.
-
Assign colors to categories or priorities:
Next, decide how you want to use the colors in your digital planner. You might assign a specific color to each task category (e.g., work, personal, family), or you could use colors to indicate priority levels (e.g., red for urgent tasks, yellow for important tasks, green for less urgent tasks).
-
Be consistent:
Make sure to apply your color-coding system consistently across your digital planner. This will help you quickly recognize tasks and priorities at a glance.
-
Use color-coding in conjunction with other organizational tools:
Don’t rely solely on color-coding to keep your planner organized. Combine it with other techniques, like breaking down tasks into smaller parts or using the Eisenhower Matrix, for maximum productivity.
-
Adjust as needed:
Over time, you may find that your color-coding system needs tweaking. Don’t be afraid to make adjustments to better suit your needs and preferences.
By incorporating color-coding into your digital planner, you can create a visually appealing and organized system that helps you stay focused and on top of your tasks.
6. Break Down Tasks into Smaller Parts
Breaking down tasks into smaller, more manageable parts is a great way to improve your productivity when using a digital planner. By dividing larger tasks into bite-sized chunks, you can reduce feelings of overwhelm and make it easier to tackle your to-do list. Here’s how to break down tasks effectively:
a. Identify the main task:
Start by determining the primary task you want to accomplish. This could be anything from completing a project at work to planning a family vacation.
b. List the subtasks:
Next, brainstorm all the smaller steps needed to complete the main task. These subtasks should be specific, actionable steps that you can realistically complete within a short period.
c. Organize the subtasks:
Once you have a list of subtasks, arrange them in a logical order. This will help you see the natural progression of the task and make it easier to stay on track.
d. Add the subtasks to your digital planner:
Input each subtask into your digital planner, along with any relevant due dates or reminders. Be sure to use your color-coding system and other organizational tools, like the Eisenhower Matrix, to keep everything organized.
e. Focus on one subtask at a time:
When it’s time to work on your main task, concentrate on completing one subtask before moving on to the next. This will help you maintain momentum and avoid feeling overwhelmed by the larger task.
f. Review and adjust:
As you work through your subtasks, you may need to make adjustments to your plan. Don’t be afraid to modify your list of subtasks or their order if it helps you stay on track and be more productive.
By breaking down tasks into smaller parts in your digital planner, you can tackle even the most daunting to-do list with confidence and ease.
7. Prioritize Tasks with the Eisenhower Matrix
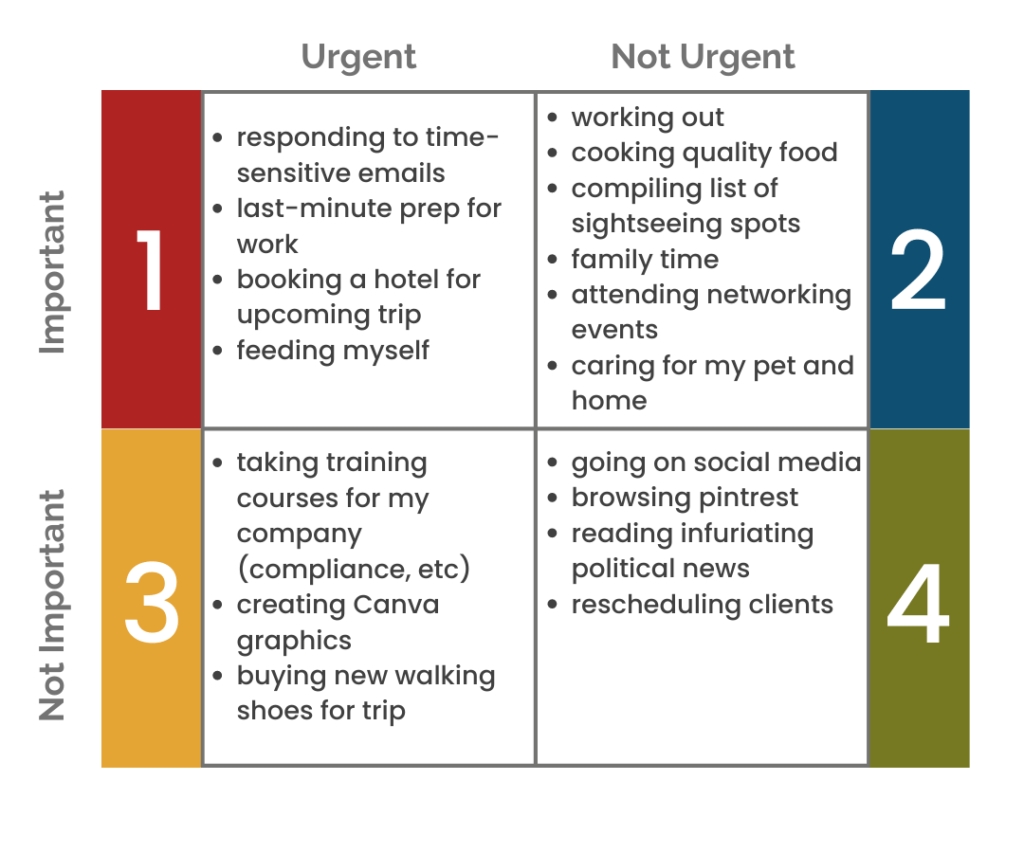
Prioritizing tasks is crucial for boosting your productivity, and the Eisenhower Matrix is a useful tool to help you do just that. This simple method helps you categorize tasks based on their importance and urgency, making it easier to decide which tasks to tackle first. Here’s how to use the Eisenhower Matrix with your digital planner:
a. Understand the matrix:
The Eisenhower Matrix consists of four quadrants:
- Quadrant 1: Important and urgent tasks
- Quadrant 2: Important but not urgent tasks
- Quadrant 3: Not important but urgent tasks
- Quadrant 4: Not important and not urgent tasks
b. Sort your tasks:
Review your to-do list in your digital planner and categorize each task into one of the four quadrants. Be honest with yourself about the importance and urgency of each task.
c. Create a plan of action:
Based on the quadrant each task falls into, decide on the best course of action:
- Quadrant 1 tasks should be done immediately.
- Quadrant 2 tasks should be scheduled for later.
- Quadrant 3 tasks can be delegated or outsourced if possible.
- Quadrant 4 tasks can be eliminated or postponed indefinitely.
d. Update your digital planner:
Adjust your digital planner to reflect the new priorities you’ve assigned to your tasks. Make sure to set reminders and deadlines for tasks in Quadrants 1 and 2, and delegate or eliminate tasks in Quadrants 3 and 4 as necessary.
e. Review and adjust:
Periodically review your tasks and their assigned quadrants to ensure they still align with your priorities. Adjust the Eisenhower Matrix as needed to keep your digital planner up-to-date and your productivity on track.
By using the Eisenhower Matrix with your digital planner, you’ll be better equipped to prioritize tasks and make the most of your valuable time.
8. Set Reminders and Deadlines
One of the best features of a digital planner is the ability to set reminders and deadlines. By doing so, you’ll always know what needs to be done and when, helping you stay accountable and on track. Here’s how to harness the power of reminders and deadlines in your digital planner:
a. Identify key tasks:
Look through your planner and pinpoint the tasks that require a deadline or a reminder. These might include time-sensitive projects, appointments, or even personal goals you want to achieve.
b. Set deadlines:
For each task that requires a deadline, input the due date in your digital planner. Make sure the deadlines are realistic, giving you enough time to complete the task without causing unnecessary stress.
c. Create reminders:
Set reminders for important tasks to ensure you don’t forget about them. You can choose when the reminder should appear—be it a few hours, days, or even weeks before the deadline. Consider setting multiple reminders for tasks with longer timeframes, as this can help you stay on track and prevent last-minute scrambling.
d. Make them visible:
Ensure that your reminders and deadlines are easily visible in your digital planner. This might mean using bold or colored text, or placing them at the top of your to-do list. The key is to make them stand out so you’re always aware of what’s coming up.
e. Adjust as needed:
Life can be unpredictable, and sometimes deadlines need to be shifted or reminders updated. Don’t be afraid to make changes in your digital planner as needed—just make sure to update your reminders and deadlines accordingly.
By effectively using reminders and deadlines in your digital planner, you’ll find it easier to stay organized, manage your time, and ultimately boost your productivity.
9. Track Your Progress
Tracking your progress is an essential part of using a digital planner to boost your productivity. By monitoring your achievements and evaluating your performance, you’ll gain valuable insights into what’s working and what needs improvement. Here are some tips for effectively tracking your progress with a digital planner:
a. Set milestones:
Break your goals into smaller, manageable milestones, and mark them in your digital planner. This will help you see the steps needed to reach your goals and make it easier to track your progress.
b. Update regularly:
As you complete tasks and reach milestones, make sure to update your digital planner accordingly. This will give you a sense of accomplishment and motivate you to keep going.
c. Visualize your progress:
Use charts, graphs, or other visual aids within your digital planner to represent your progress. Seeing your achievements in a visual format can be highly motivating and help you stay focused on your goals.
d. Reflect on your performance:
Take some time each week or month to review your progress in your digital planner. Consider what worked well, what didn’t, and what you can do differently moving forward. This reflection will help you make informed decisions and improve your productivity.
e. Adjust your goals:
As you track your progress, you may find that some goals need to be adjusted or re-evaluated. Don’t be afraid to make changes in your digital planner if your priorities shift or if you discover new opportunities along the way.
By consistently tracking your progress in your digital planner, you’ll have a clear understanding of your accomplishments and areas for improvement. This valuable information will help you make better decisions, stay motivated, and ultimately boost your productivity.
10. Regularly Review and Update Your Planner
For a digital planner to be truly effective in boosting your productivity, it’s important to regularly review and update its contents. This ensures that your planner remains relevant, adapts to your changing needs, and helps you stay on track with your goals. Here are some tips to help you maintain an up-to-date and effective digital planner:
a. Set a review schedule:
Establish a routine for reviewing your digital planner, such as daily, weekly, or monthly, depending on your needs. This will help you stay consistent and make it easier to spot patterns or trends in your productivity.
b. Adjust tasks and goals as needed:
Life can be unpredictable, and your priorities may change over time. As you review your digital planner, make any necessary adjustments to your tasks and goals to reflect your current situation and priorities.
c. Remove completed tasks:
As you complete tasks in your digital planner, be sure to remove them or mark them as completed. This will help declutter your planner and give you a sense of accomplishment as you see tasks being checked off.
d. Reassess your productivity tools:
If you find that certain features or tools within your digital planner aren’t working for you, don’t be afraid to try new ones. Regularly exploring and experimenting with new features can help you find the perfect combination that works best for your needs.
e. Reflect on your progress:
As you review and update your digital planner, take note of your successes and areas for improvement. Use this information to adjust your strategies and continue moving forward towards your goals.
By regularly reviewing and updating your digital planner, you’ll ensure that it remains a valuable tool in boosting your productivity. This ongoing maintenance will help you stay focused, adapt to changes, and ultimately achieve your goals more efficiently.
Conclusion:
Incorporating these 10 tips into your digital planner routine can significantly enhance your organization, productivity, and overall success. By harnessing the full potential of your digital planner, you’ll be better equipped to manage your time effectively, achieve your goals, and ultimately lead a more fulfilling and productive life. So, why wait? Start implementing these tips today and take your productivity to new heights with your digital planner!